How to Set a Restore Point on Windows 7
Z7_3054ICK0KGTE30AQO5O3KA30N0
hp-concentra-wrapper-portlet
![]() Actions
Actions
HP PCs - Using Microsoft System Restore (Windows 7)
This document applies to HP and Compaq desktop and notebook computers with Windows 7.
This document explains how to use and troubleshoot the System Restore feature in Windows 7.
About System Restore in Windows 7
System Restore is a software program available in all versions of Windows 7. System Restore automatically creates restore points, a memory of the system files and settings on the computer at a particular point in time. You can also create a restore point yourself. Then, when you use System Restore to restore your computer to a point in time before an issue began, System Restore returns your computer to the files and settings from the restore point. Your personal files and documents are not affected.
You can also undo a System Restore if the restore does not resolve the issue or if the issue worsens.
Differences between System Restore and HP Recovery Manager
Microsoft's System Restore is sometimes confused with HP's Recovery Manager software.
-
System Restore enables you to configure the computer's system files to a configuration that existed at a particular point in time. No personal data files, such as email, documents, or pictures, are lost.
-
HP Recovery Manager enables you to restore the computer's entire software configuration to its original factory condition. It reinstalls the original operating system (Windows, Linux or FreeDOS) and removes all other software and personal data files.
Whenever the computer suddenly develops a problem, you should first perform a System Restore to try to resolve the issue before performing a complete recovery using HP Recovery Manager.
Enabling System Restore in Windows 7
Microsoft System Restore is enabled by default on most, if not all, HP computers that come with Windows 7. However, Microsoft System Restore can be disabled and can cause problems if you try to restore from a previous point. To make sure System Restore is enabled, complete the following steps:
Show me how

-
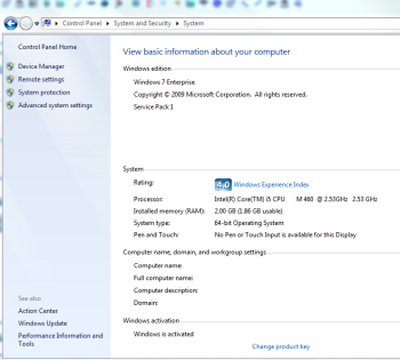
Click Start (
 ), right-click Computer, and then select Properties. The System window displays.
Figure : System window
-
On the left side of the System window, click System protection. The System Properties window displays, and the System Protection tab is active.
If you are prompted for an Administrator password or confirmation, type the password or provide confirmation.
Figure : System Properties window

-
In the center of the System Properties window, check whether System Restore is enabled:
-
If Off is listed in the Protection column, System Restore is disabled. Click Configure, select Restore system settings and previous versions of files, and then click OK. System Restore is now enabled. Continue to Creating a restore point in System Restore, Windows 7.
Figure : Enabling System Restore

Creating a restore point in System Restore, Windows 7
Windows 7 automatically creates restore points at regularly scheduled intervals and before many software installations. If you would like to create a restore point manually, use the following steps:
Show me how
-
Click Start (
), right-click Computer, and then select Properties. -
On the left side of the System window, click System protection. The System Properties window displays, and the System Protection tab is active.
If you are prompted for an Administrator password or confirmation, type the password or provide confirmation.
Figure : System Properties window
-
Select a disk to store the restore point system files from the list, usually (C:), and then click Create.
Figure : Creating a restore point

-
Type a name describing the restore point.
Figure : Naming the restore point

-
Click Create.
Windows creates the restore point.
-
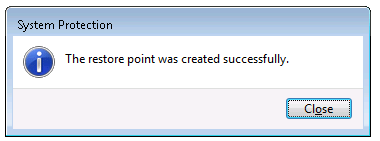
When finished, a window opens stating a restore point was created successfully.
Figure : Success message
Restoring Windows 7 to a previous point
If the computer stops working correctly, you can restore it to a previous point in time when it was working. Use the following steps to restore your computer's configuration.
Show me how
-
To be safe, back up any important files before restoring from a restore point.
-
Close any open software windows.
-
Click Start (
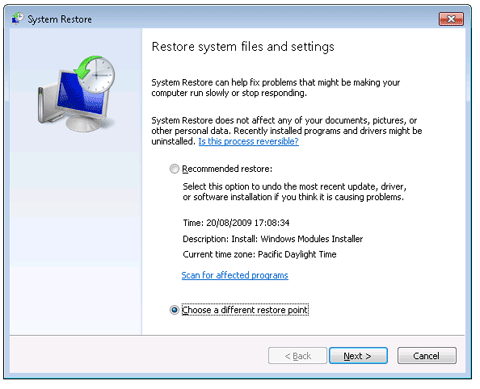
), click All Programs, click Accessories, click System Tools, and then click System Restore.The Restore system files and settings window opens.
Figure : Restore system files and settings window
-
Select Choose a different restore point , and then click Next.
-
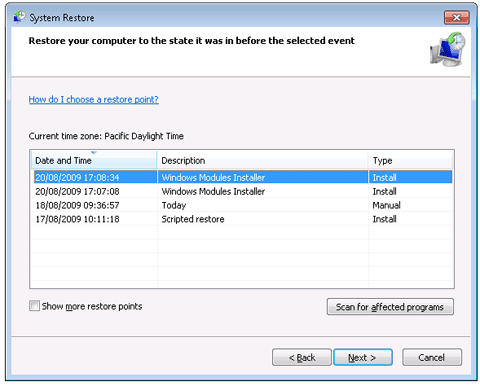
Select a date and time from the list of available restore points, and then click Next.
System files are added, removed, or changed to match the same collection of system files that were in the computer's system file configuration on the selected date.
caution:
Software and drivers installed after the selected date might not work correctly and might need to be reinstalled.
Figure : Choosing a restore point
-
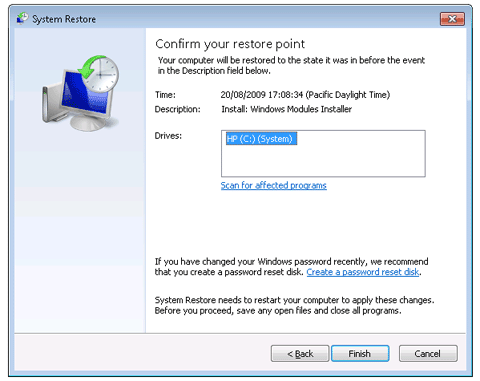
Make sure this is the restore point you want to use, and then click Finish.
Figure : Confirming your restore point
-
Click Yes in the confirmation message that appears.
-
The computer should shut down and turn back on automatically after the restoration completes.
Figure : Success message

-
Click Close. The files and programs on your computer have now been restored to the way they were on the date of the restore point you selected.
note:
System Restore did not complete successfully. Your computer's system files and settings were not changed ...
-
After System Restore is finished you should download the latest Windows updates from Microsoft. Also, download all the latest updates for your virus protection software and run a virus scan.
Undoing a System Restore in Windows 7
Follow these steps to undo the restore and put the files and programs on your computer back to the way they were before you used System Restore.
Show me how
-
Click Start (
), click All Programs, click Accessories, click System Tools, and then click System Restore. -
Select Undo System Restore, and then click Next.
Figure : Undoing System Restore

-
Confirm you have selected the right date and time, and then click Finish.
Figure : Confirming the undo

-
Click Yes in the confirmation message that displays.
-
The computer should shut down and turn back on automatically after the undo restore operation completes.
The success message appears.
Figure : Success message

-
Click Close. The restore operation has been undone.
note:
System Restore did not complete successfully. Your computer's system files and settings were not changed ...
Using System Restore when Windows 7 cannot start normally
Use the following steps when Windows does not open normally.
Show me how
-
Turn off the computer and wait at least 5 seconds with the computer in a full off state.
-
Turn on the computer and press the F11 key repeatedly as the computer starts.
-
Under I need help immediately, click Microsoft System Restore.
What to do when System Restore fails in Windows 7
Use the following steps if System Restore fails to create a restore point or fails to restore.
Step one: Disabling virus scanning protection when System Restore fails in Windows 7
Malware scanning software can have built-in protection systems that prevent other software programs from altering their structure - including System Restore. When System Restore is unable to use the files of the scanning software, System Restore fails and the following message appears:
System Restore did not complete successfully. Your computer's system files and settings were not changed ...
To successfully restore your system, temporarily disable virus scanning and the built-in protection.
As an example, many HP and Compaq desktop computers come with Norton Internet Security software. If your computer has Norton Internet Security, you can use the following steps to temporarily disable its built-in protection:
note:If your computer uses a different type of virus protection, use the manufacturer's instructions to disable the protection temporarily.
Show me how
-
Disconnect from the Internet. Physically disconnect your network cable or press the disconnect button on your router.
-
Click Start, click All Programs, click Norton Internet Security, and then click Norton Internet Security.
-
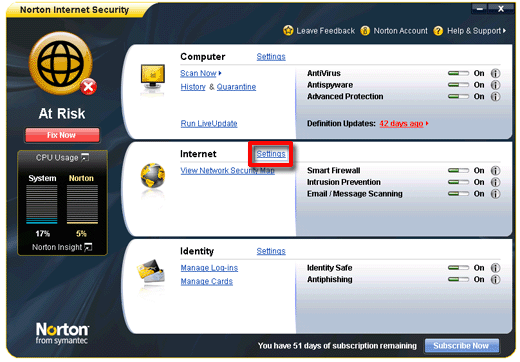
In the Internet section, click Settings.
Figure : Norton Internet Security main window
-
In the Additional Options section, click Virus and Spyware Protection.
-
Click Miscellaneous Settings, and then click the button next to Norton Product Tamper Protection to turn the protection Off.
Figure : Miscellaneous Settings

-
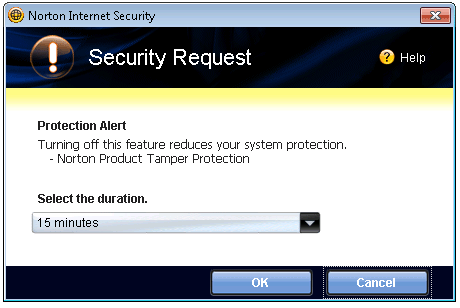
The Security Request message displays. Leave the duration at 15 minutes, and then click OK.
Figure : Security Request
Step two: Enabling System Restore in Windows 7
If System Restore does not work in Windows 7, use the following steps to make sure System Restore is enabled and active:
Show me how
-
Click Start (
), right-click Computer, and then select Properties. The System window displays.Figure : System window
-
On the left side of the System window, click System protection. The System Properties window displays, and the System Protection tab is active.
If you are prompted for an Administrator password or confirmation, type the password or provide confirmation.
Figure : System Properties window
-
In the center of the System Properties window, check whether System Restore is enabled:
-
If On displays in the Protection column, System Restore is enabled.
-
If Off displays in the Protection column, System Restore is disabled. Click Configure, select Restore system settings and previous versions of files, and then click OK. The System Properties window displays, and the System Protection tab is active.
Figure : Enabling System Restore
-
-
If the System Restore did not complete successfully. Your computer's system files and settings were not changed ... message displays, continue to the next step.
Step three: Using System Restore in Safe Mode in Windows 7
Use the following steps to open and use System Restore in Windows 7 safe mode:
Show me how
-
Turn on the computer and immediately press the F8 key repeatedly until the startup menu displays.
-
From the Advanced Boot Options menu, select Safe Mode with command prompt, and then press Enter.
-
At the command prompt, type rstrui.exe, and then press Enter.
-
Read and respond to the screens to restore the system.
If the System Restore did not complete successfully. Your computer's system files and settings were not changed ... message displays, continue to the next step.
-
Reconnect the network connection when finished.
Step four: Starting from Windows System Recovery Options in Windows 7
How to Set a Restore Point on Windows 7
Source: https://support.hp.com/us-en/document/c01835735